Here is the second part of shirt stitching tutorial… we are going to see more instructions elaborately as well as simply. If any one new to this tutorial, please check previous 3 tutorials to better understanding of shirt details… Please refer previous tutorials as below...
Now move to our continuation…
Shirt’s Front & Back joining:

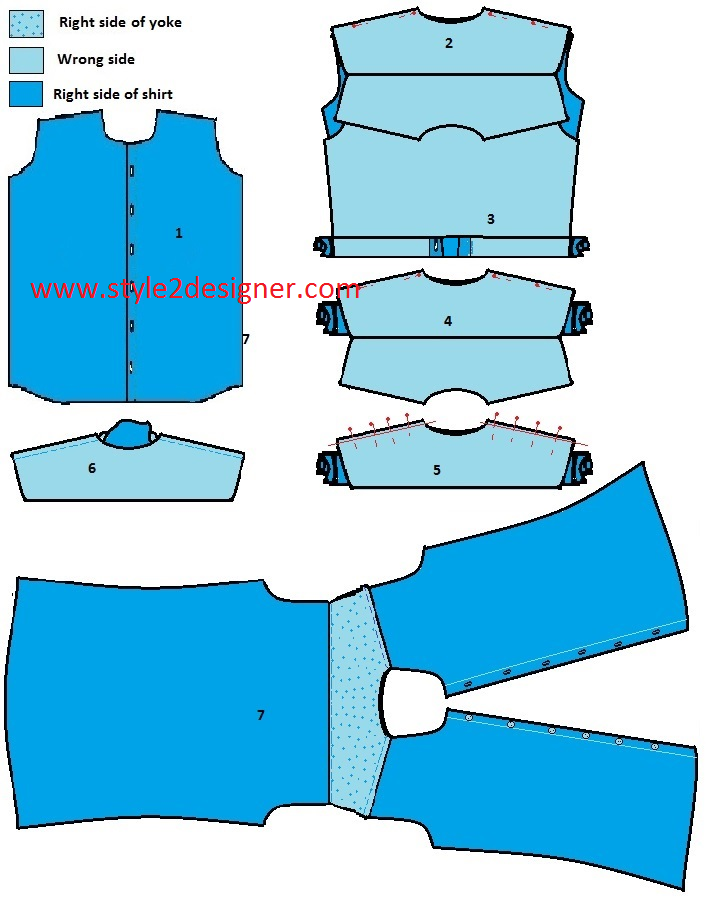
- First place front and back pieces facing right side together.
- Open the yoke pieces like a greeting card. Pin shoulder portion of one of the yoke pieces with Shirt’s front.
- Now start to role from the bottom of front & back pieces together.
- Make a tight role towards the end of yoke attached line.
- Then flip the other yoke piece to the opposite side to join the shoulder area which already pinned. Now the front shoulder is in the middle of two yoke pieces shoulder secure with more pins and sew along ¼” away from edges.
- Remove the pins and turn out the shirt front & back through the neckline.
Press then give top stitch.
Sleeve slit finishing:

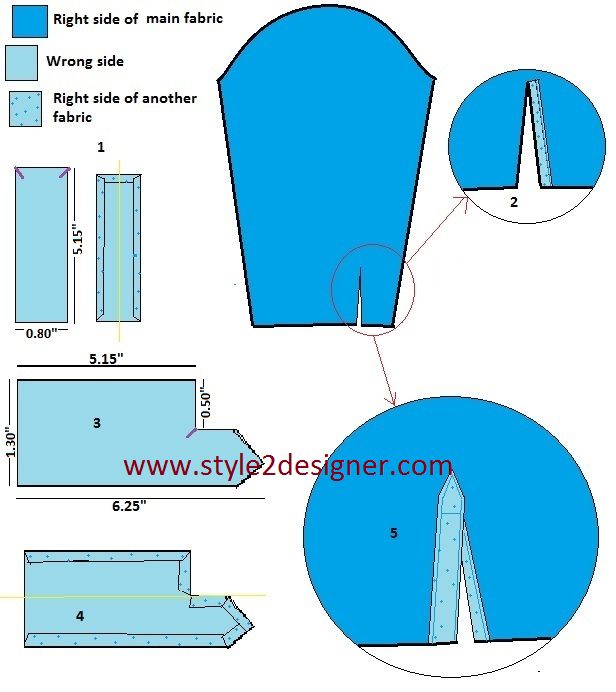
- First we are going to do the under slit of sleeves. Take rectangle piece of fabric with mentioned measurements given in image. Cut slantwise (mentioned in image as purple line) at the top corners to fold the three sides seam allowances of 0.15”. Press after fold. Then fold again that piece into half and press.
- Now attach that piece into sleeve’s under slit (folded fabric piece should cover the slit like catchy clip) by top stitch.
- Now time to make diamond placket for upper slit. Cut diamond placket piece (refer image for measurement) and make a slantwise cut as mentioned in image to fold seam allowance 0.15” at the diamond portion.
- Fold all sides seam allowances 0.15” (refer image) and press then fold diamond placket piece into half and press again.
- Place diamond placket into the upper slit and secure with edge stitch. That diamond portion around stitches secure the slit end and under slit also.
Note: *For ease take seam allowance 0.25” instead of 0.15”. Be alert while cut pieces with these measurement changes. *Use pins to secure placket pieces with slit. *Don’t hesitate to press for each folds, press makes that fabric even stiff that’s help to fix perfectly in place.
Sleeve attaching:

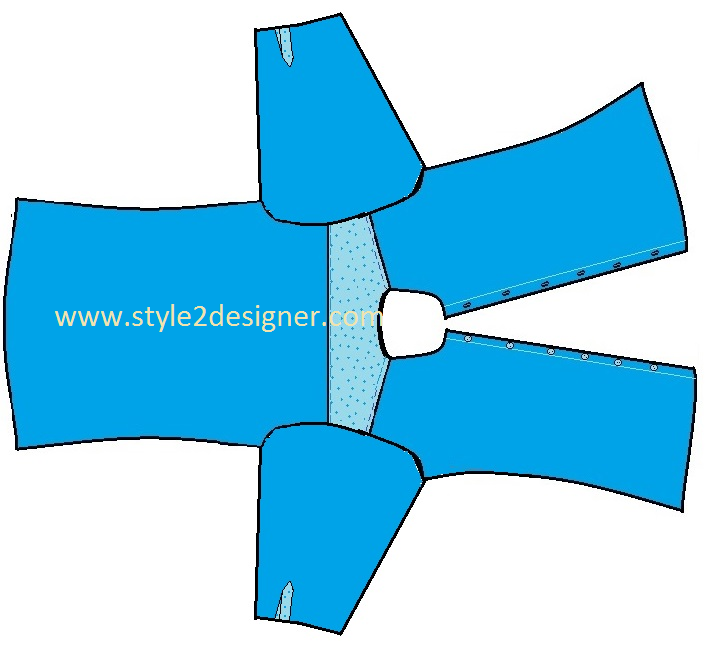
- This is the stage to attach sleeves at the armholes.
- Place sleeve and shirt piece at armhole right side facing right side together and sew 0.25” seam allowance away from edges.
Making Cuffs:

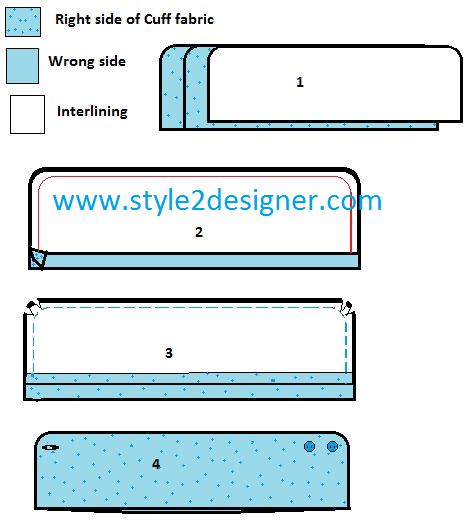
- We have two pieces of fabric and 1 piece of interlining for each cuff.
- Now Press interlining with the wrong side of one cuff piece. Then sew along the three sides as mentioned in image. Ensure the sewing line follows the curve at the distance from the edge for the seam allowance.
- Cut notches in the seam allowances at curved area to reduce the bulk of the seam. We need to do this so that the fabric can be turned to the right side. Turn right side out and press.
Instruction takes too long… We are going to finish shirt with our next tutorial.
I am also a tailor. I live In Uganda. how can I meet you to get some of your skills. thank you madam, may God bless You
ReplyDeleteExcellent notes,Thank you for your kind service to all of us trying to learn sewing..a
ReplyDelete