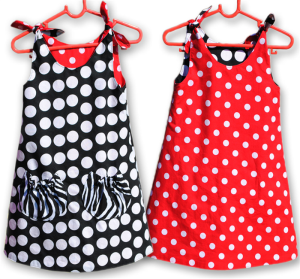
Here I have attached some reversible frock cutting and sewing images for better understanding… enjoy sewing with these simple steps…
Reversible frock Mesurements:
Length - 45cms
Chest - 51cms
Shoulder – 24cms
Materials suggested for Reversible frock:
Light weight fabrics like chiffon, voile
Materials required for this Reversible frock:
Two colour fabrics. ¼ meter each and another color fabric for Bias strip.
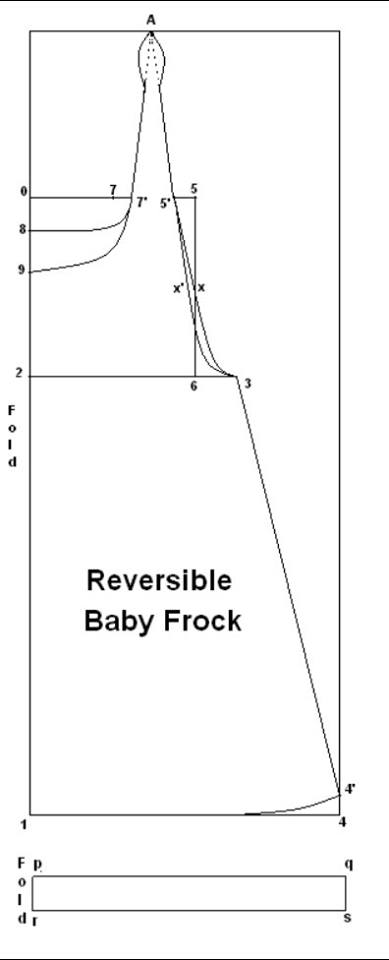
Reversible Frock Pattern Draft / Cutting:
(0-1) = 45cms
(0-2) = Armhole depth ( ¼ chest) = 12.75
(2-3) = ¼ chest +2.5cms = 15.25cms
(1-4) = ½ chest – 3cms = 22.5cms
(4-4’) = 1.5cms for shaping. Join (1-4’) hemline. Join (3-4’) side seam.
(0-5) & (2-6) = ½ shoulder
(0-7) = Neck width = 1/12 chest +1.5cms = 6cms
(7-7’) & (5-5’) = 1.5cms
(7’-A) & (5’-A) = 12cms
X is the mid point of (5-6). (X-X’) = 0.5cm inside.
Shape 5’-X -3 for back armhole curve. Shape 5’-X’-3 for Front armhole curve.
(0-8) = Back neck depth = 2.5cms. Shape (8-7’) for back neck curve.
(0-9) = Front neck depth = 1/12 chest + 2.5cms =6.75cms. Shape (9-7’) for Front neck curve.
For Bias strip: (p-q) = (r-s) = 45cms & (p-r) = (q-s) = 10cms
Cutting line:
Back: 8-7’-A-5’-X-3-4’-1 (8-1) on fold
Front: 9-7’-A-5’-X’-3-4’-1 (9-1) on fold
Seam allowance should be 1 cm for all sides.
Bias Strip making Instruction:
[caption id="attachment_5586" align="aligncenter" width="600"]
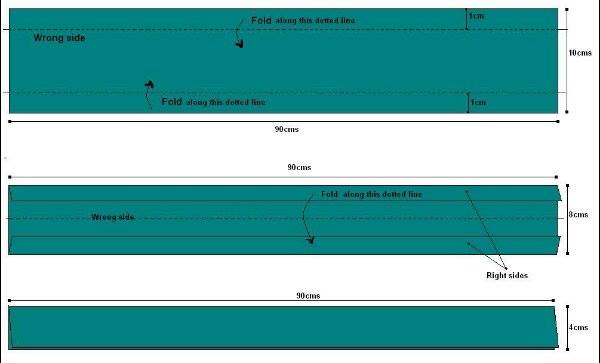 Press with iron after each fold.[/caption]
Reversible frock Sewing Instructions:
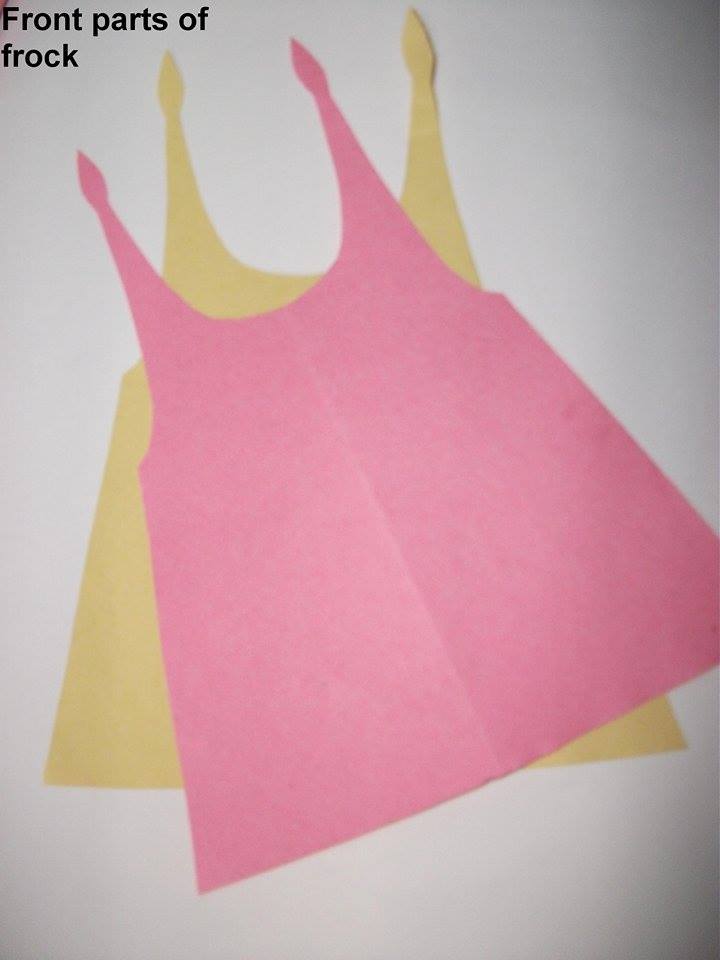
Cut Front part of Frock (2 pieces)

Cut Back part of Frock (2 pieces)
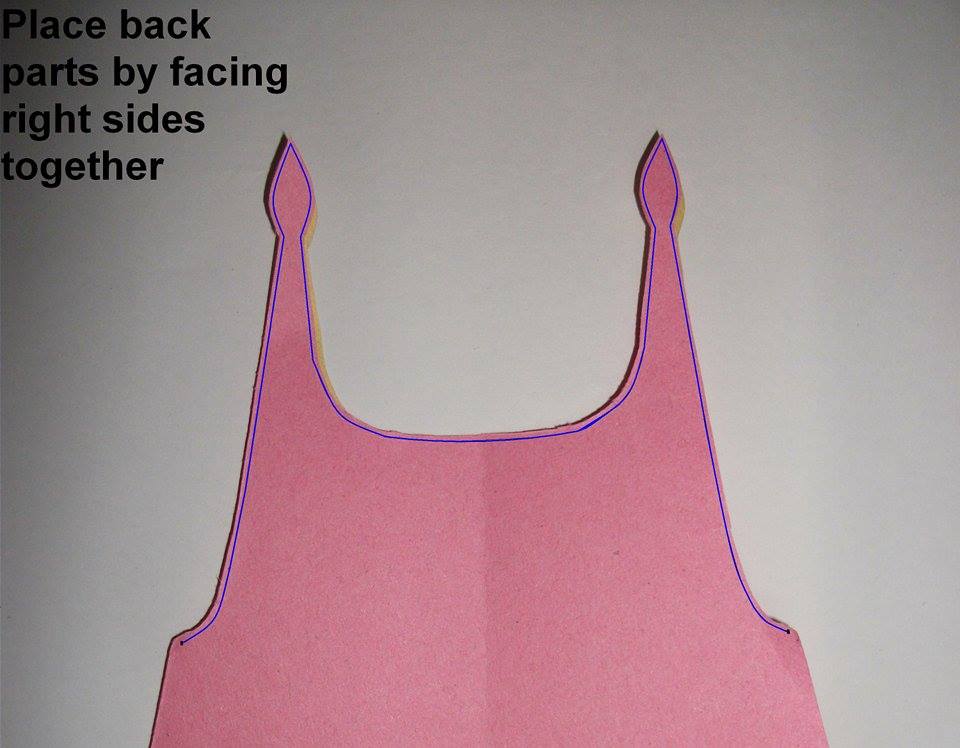
Place Back parts by facing right sides together and sew along the blue line as mentioned in this picture. Leave 1cm (side seam) each side. After sewing turn right side out & Iron.

Place Front parts by facing right sides together and sew along the blue line as mentioned in this picture. Leave 1cm (side seam) each side. After sewing turn right side out & Iron
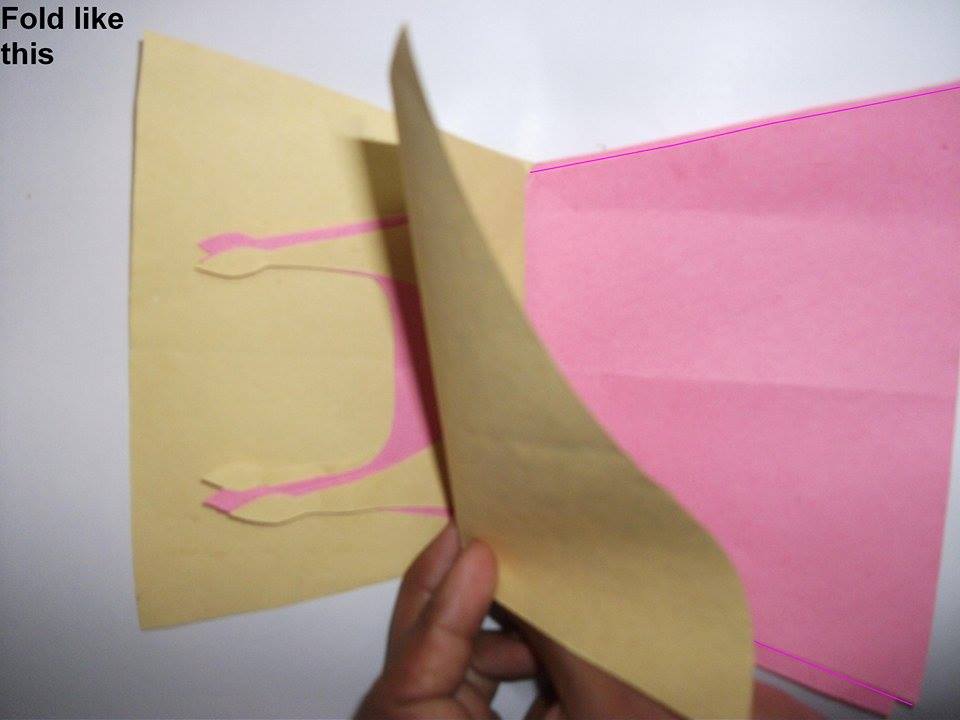
Place Back & Front parts by facing the same color together. Then fold the other color flare portions upward as shown in this picture
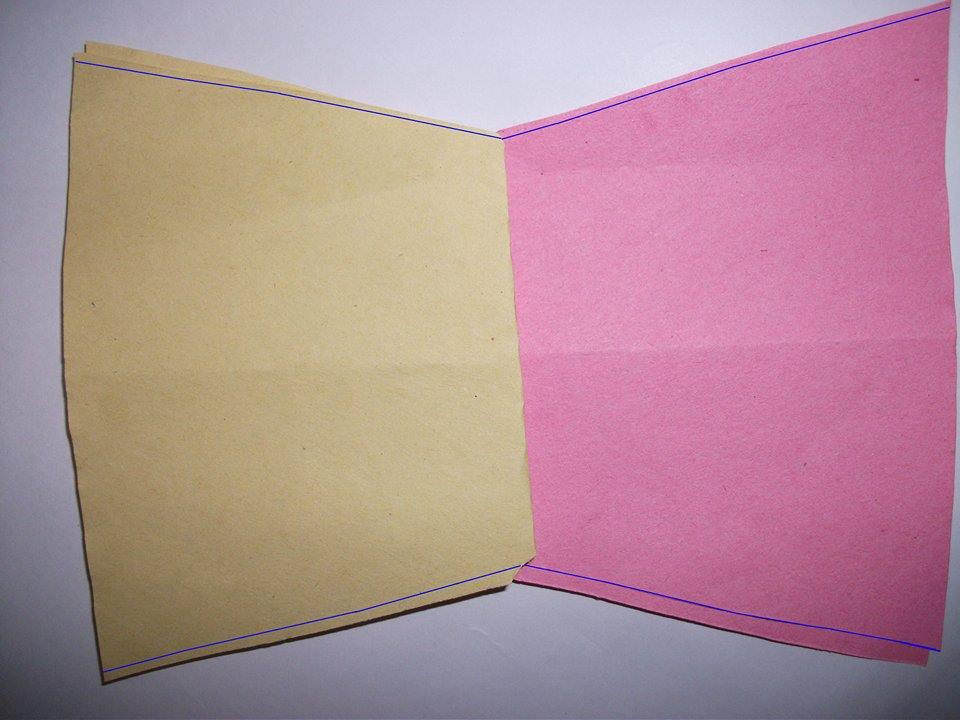
After folding, it looks like this. Now the back & front part of each color facing right sides together. Then Stitch along the side seams of each color part separately
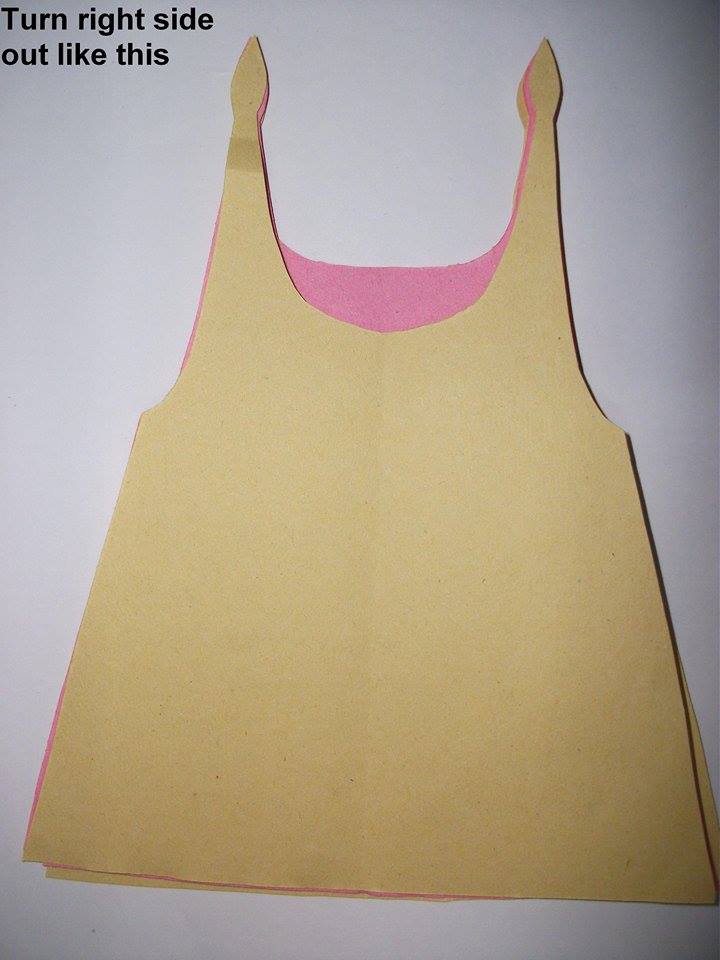
Turn right sides out

Now we r going to do the Final step…Finishing hemline with Bias strips (it should be another color plain material or printed) sew along the blue line. I use another color plain material Bias strip here.
Now the Reversible Frock is ready…
Lovely very useful and well explain will try this.. thank u
ReplyDeleteWelcome..have great time with sewing.. Thanks & good luck..
ReplyDeleteVery well explained. U made it look so easy. Will definitely try this. Good job
ReplyDeletethanks Hina....:-)
ReplyDeleteThanks Keerthi, for a such a nice tutorial. Its so easy to understand with the images you have provided. thank you so much
ReplyDeleteHi.. Lakshmi... Thank u... easy to understandable tutorial is my moto... i think i'm doing my job perfect...
ReplyDeleteThank you soo much...u r doing a great job
ReplyDeleteHey thank q soo much...u r doing a great job
ReplyDeleteThanks for your visit... Nikhar mehrotra..
ReplyDeletePlz send the ladies shirt drafting....
ReplyDelete